SQL Server requisites
Overview
Bizagi Studio requires a database server to host the processes repository. It supports Microsoft SQL Server as the database server.
Supported Versions and Editions
| Version | Version Number |
|---|---|
| SQL Server 2019 Ensure you meet the SQL Server system requirements. | 15.0.2000 or above |
| SQL Server 2017 | 14.0.3048 |
| SQL Server 2016 SP2 | 13.0.5026 or above |
| SQL Server 2016 SP1 | 13.0.4001 or above |
| SQL Server 2014 | 12.0.2000 or above |
| SQL Server 2012 | 11.0.2100 or above |
- All editions are supported for Bizagi Studio.
- Note: SQL Express Edition has a 10 GB database limit. Refer to SQL Express details for more information.
- For production environments, only Standard or higher editions are recommended due to higher transaction demands.
Database Collation Requirements
Ensure the database instance uses a collation that:
- Is case-insensitive (CI).
- Is not a Turkish collation.
Required Configurations
To configure SQL Server for Bizagi, ensure the following:
1. SQL Server Authentication
- Enable SQL Server authentication mode.
- Use SQL Server Management Studio (SSMS):
- Right-click on your instance, select Properties.
- Go to the Security tab and select SQL Server and Windows Authentication Mode.
- Click OK.
2. TCP/IP Protocol
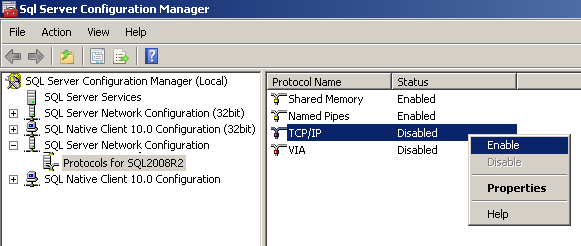
- Enable the TCP/IP protocol using SQL Server Configuration Manager:
- Locate your instance under SQL Server Network Configuration.
- Right-click TCP/IP and select Enable.
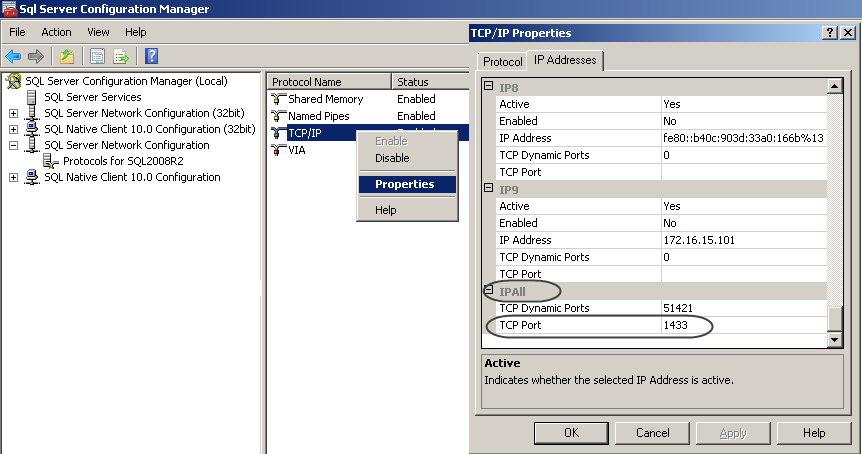
- Define the TCP port explicitly (default is
1433), and ensure no firewall rules block this port. - For remote access, enable Allow remote connections in SSMS:
- Go to Instance Properties > Connections and check this option.
3. Authorized Login Accounts
- Ensure at least one authorized login account:
- Use SQL Server authentication.
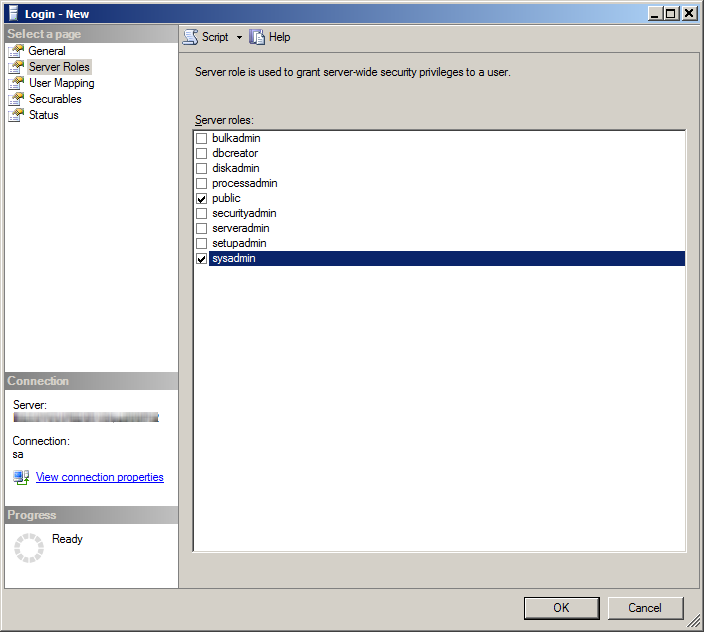
- Grant the sysadmin server role.
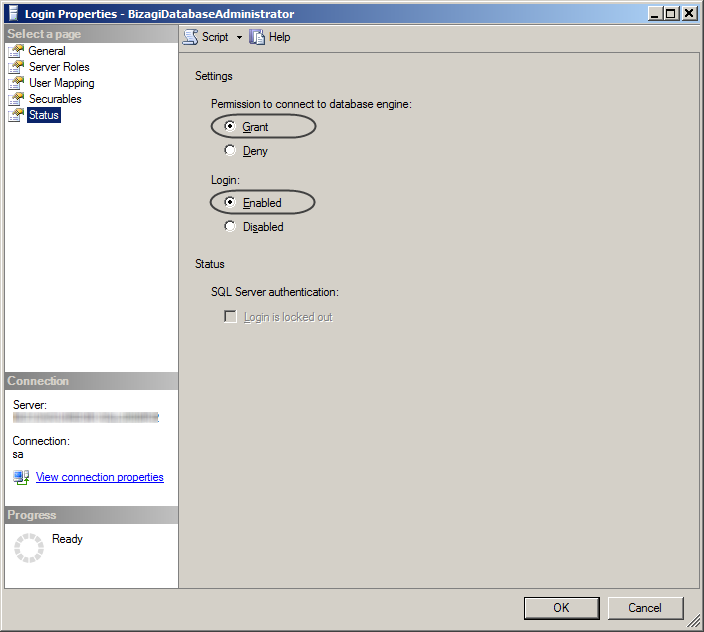
- Confirm the account is enabled and has connection permissions.
Verifying SQL Server Configuration
Carry out the steps described next, to make sure that your SQL Server instance is set to work with Bizagi. To verify the configuration of your SQL Server instance (or set it up), you will need the SQL Server client and configuration tools.
What tools required for these steps are: SQL Server Management Studio and SQL Server Configuration Manager. Both tools can be included when installing the SQL Server database. In case that your SQL Server version does not include the SQL Server Management Studio, you may download and install it directly from Microsoft's official web site at no cost.
Which version do I have?
To easily determine your version of SQL Server, use the SQL Server Management Console.
Run the following while connected to your database instance:
Select @@version
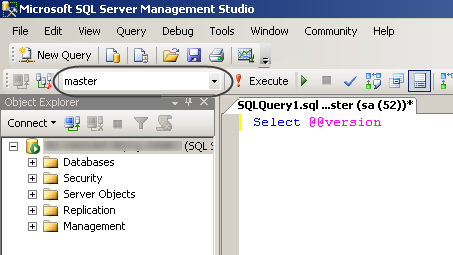
This shows you information about your instance, presented as shown:
•The product's official name and service pack
•The exact version number and its date
•Additional detail about the SQL Server edition and bit support.

Checking the required configuration
Check or configure the following requirements.
- SQL Server Authentication
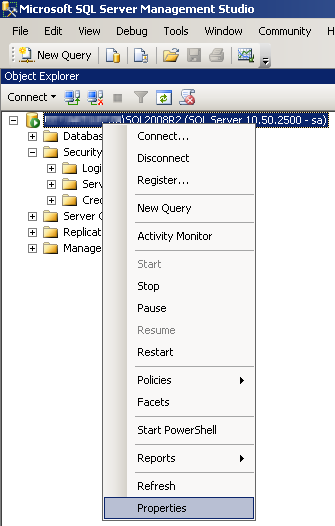
Run the SQL Server Management Studio.
Connect to your instance, and right-click it to select that instance's properties:
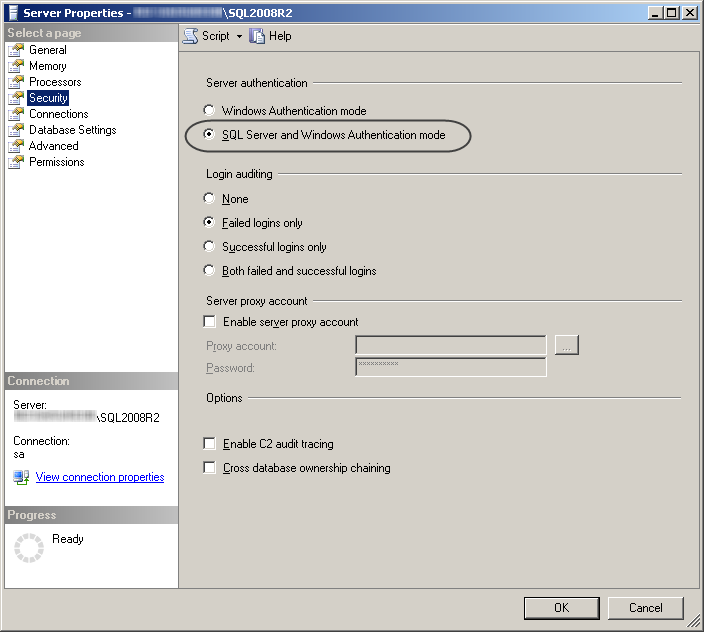
In the Security option, make sure that the SQL Server and Windows Authentication Mode is checked and then click OK.
- TCP/IP Protocol
Run the SQL Server Configuration Manager.
 Enable the TCP/IP protocol for your database connection by locating the specific database instance (under the SQL Server Network Configuration), and right-click on this protocol to select Enable:
For the TCP/IP properties, it is recommended that the TCP port is explicitly defined (by default as 1433), so that dynamic ports are not used by the instance:
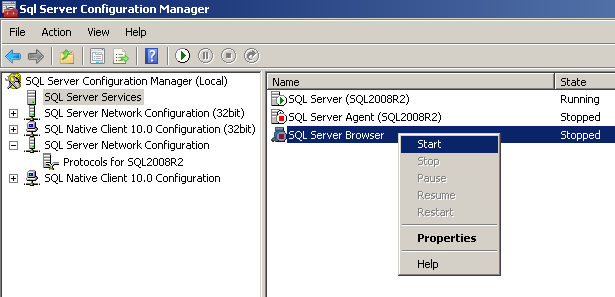
 You may want to make sure that the SQL Server Browser service is in a started mode as well:
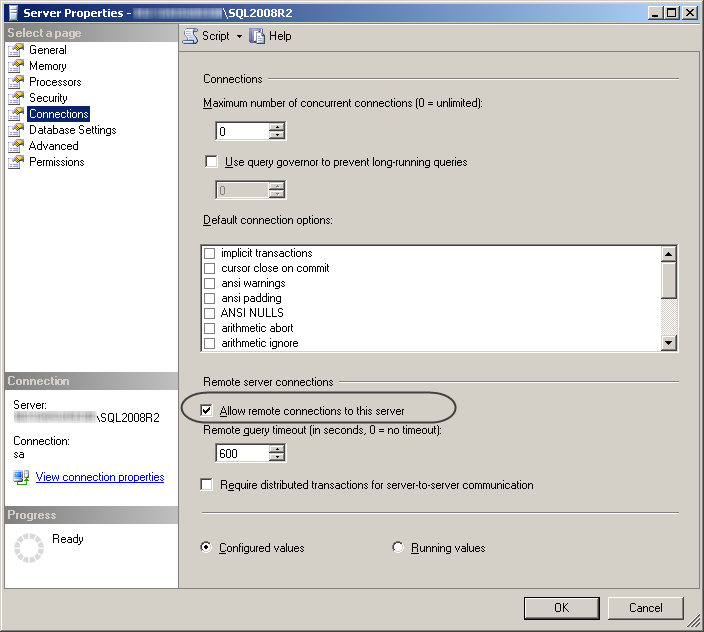
 For remote connections, make sure you configure the Allow remote connections property.
This property can be reviewed or activated through the SQL Server Management Studio, and in the database instance's properties.
Under the Connections option, make sure that this property is marked:
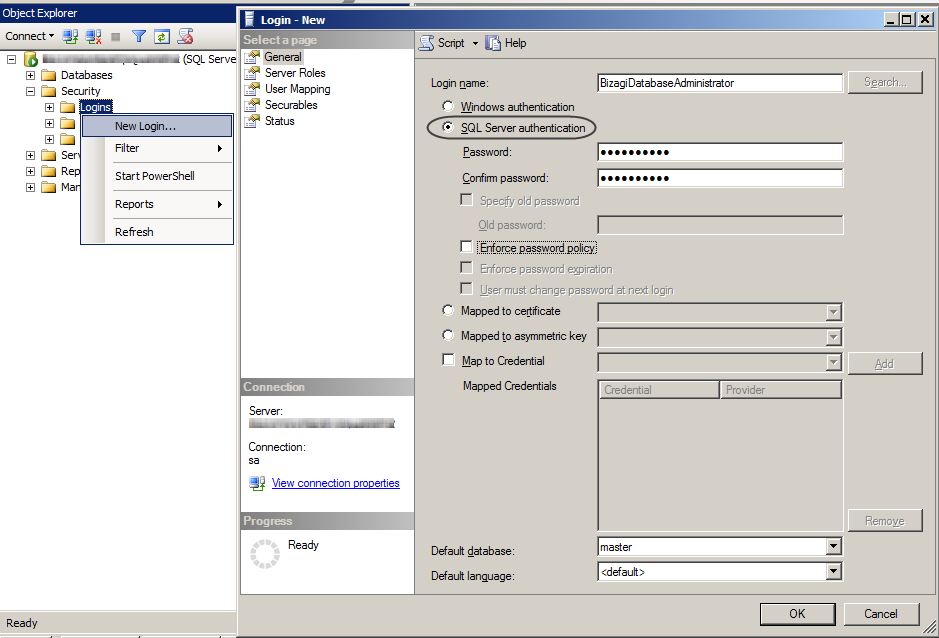
 3. Authorized Login Accounts
Run SQL Server Management Studio and make sure you are connected to your instance with an administrator account (i.e, with the sa default one).
With this user, make sure you verify that the login account you will use for Bizagi Studio meets the following conditions:
The login account uses SQL Server authentication mode:
 Make sure it has the sysadmin server role:
 Verify that the login account is enabled and granted connection, at the Status options:
Updating a Project
When you are updating a project additional from the access rights mentioned in the previous section, you need the following:
Server privileges
Set the user with privileges to backup and create the database
 GRANT BACKUP DATABASE TO UserName;
 GRANT CREATE DATABASE TO UserName;
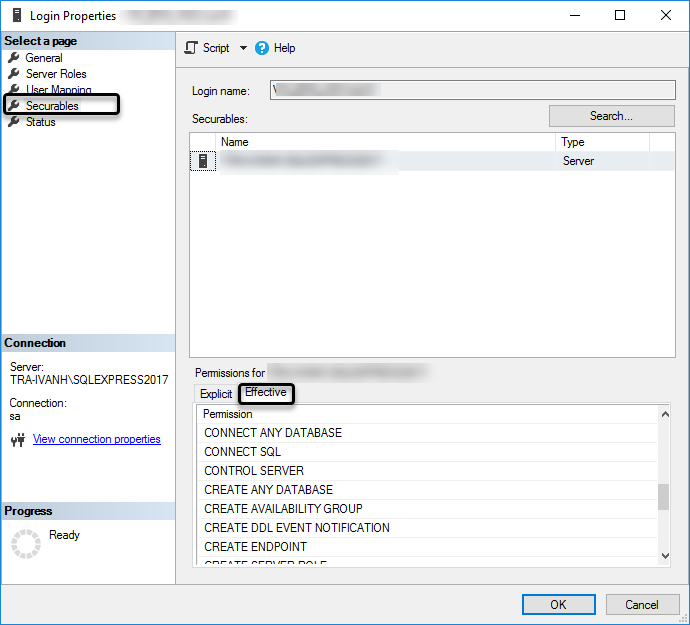
Securables
Open the Securables section, select the Effective tab and make sure that you have the following permissions;
CONNECT SQL
VIEW ANY DATABASE